Well, today is the day that a lot of people have been waiting for. Early this morning Battlefield 3 released an open beta test comprising of one multiplayer map, Operation Metro and one game type, Rush. Rush is where you have two teams, one is defending and the other attaching. The map is comprised of several segments, only unlocked through the destruction of the two comm stations for that segment. The defenders are trying to keep the attackers from planting charges and destroying those comm stations. The attackers are trying to destroy the comm stations before their player allotment runs out. With Battlefield 3 you have 100 lives, which is 25 more than Battlefield Bad Company 2, which toted the same game type. If the attackers destroy both comm stations, their allotment goes back up to 100 and the next segment of the map becomes playable. Don't go out of bounds or you will be killed after 10 seconds, but if you do cross over, there is a nice 10 second count down for you to find your way back.
After playing it for a while, it reminded me a lot of Medal of Honor's multiplayer, which I really liked. One thing that stood out was the basic weapon swaps depending on which team you are on. If you are on the US Forces side you have the M249 Saw, M16, M4; while if you are on the other side you are carrying AK-47s and other AK variants. I think this was a nice touch - all the while the guns are very different, one side is not stacked against the other. As for some other extras, the sound is amazing, movement is fluid, graphics are better than I expected for a beta test, and overall it is a fun game to play. There are some bugs, but those are a given because it is a test product. This afternoon and continuing on into the evening, the EA Online servers for Xbox 360 shut down for about 6-7 hours. This was a big hit to those people that wanted to play. I saw a lot of whiny people online saying that they aren't going to buy the real game because they couldn't play the one level demo for a few hours. Really?? I guess it gets lonely down in mom's basement without a video game to play.
As for the actual bugs in game, Battlefield wants gamers to post on their forums any problems that they find, which is where I am going to list mine. There aren't many, but the ones that have been happening wouldn't be good for the final product. I did come across a guy stuck in the floor shooting his gun straight up in the air. He managed to kill a few onlookers, but I finally put him out of his misery.
I can't wait for the real game to come out. October 25 can't get her fast enough. I am going to be sad to see the demo end on the 10th, but with 15 days to wait afterwards, I don't think it will be too bad. I am pretty excited to play though the actual campaign as well as the multiplayer. From what I have heard about the campaign, it seems like it will be one that I can play through a couple of times without it getting old.
September 30, 2011
September 24, 2011
72 Hour kit and more!
One subject that is on my mind lately has been about disasters are what to do in case of an emergency. With the recent disasters around the world (flooding, tornadoes, earthquakes, etc.), I have wondered what I would do if there were something disastrous here in Utah. Now, being that we are in Utah, the number of disasters are limited, but that doesn't mean that they are nonexistent. We live close to a railroad line that transports many different things, and if there were a crash with hazardous chemicals then we would be in trouble. Another disaster that is a "when" and not an "if" is a large scale earthquake. We live near a major fault line that hasn't seen a lot of activity, but is due for a big one. With that in mind, putting together some supplies is a very good idea. For one thing, it serves a a piece of mind for if something happens, but it also serves the purpose if there is something smaller, such as a power outage during the winter. I can pull out my survival kit and use it while the power company is working to get the power back on.
A 72 hour kit is a good starting point. Now, there are different ways of acquiring one of these. There are pre-assembled ones that you can buy that are convenient, but can be costly. One way to get one on a budget is to piece one together over a period of time. If you see a good deal, pick up some items and before you know it you have a fully stocked 72 hour kit. As for what you need in one, that is really up to the person/family that is putting it together. There are many different lists online that you can use, but it really comes down to stuff that you will use. I have seen some budget lists that contains a lot of tuna and instant noodles for their food requirements. I don't like either one of those so I why fill a kit with food you don't like? Find a list that is closely to what you want and then look through others to get additional ideas.
72 Hour Kit
What my wife and I decided to do was purchase a pre-assembled 72 hour kit and then anything extra we want, put into what I like to call a Survival Supplemental Kit. The kit we bought is from FoodInsurance.com and is called "The EmergencyPlus" kit. It comes with a two week supply of freeze dried food for one person, a complete first aid kit, and many extras. Since there are three of us (2 adults and 1 child) the food amount accounts to 4.5 days of food for all of us, which is plenty for a 72 hour kit. The other extras included are a hand crank flashlight/radio, a multi-tool, compact stove, cooking cup, water bottle with 1000 use filter, and it all comes packed into a heavy duty hiking backpack. With everything packed there is still room inside for clothes and other essentials. The shelf life for the food is 7-10 years, so it will be a while before it will have to be replaced.
Survival Supplemental Kit
This is more of a tools and safety kit. One great thing with this kit is that while I am putting this together for survival needs, it will also be great to take along any camping trip or long hike. Since it is just the extra things to go with the 72 hour kit, it will not have any food or cooking related items, so if you take it on a camping/hiking trip, pack accordingly. Listed below are some items that I will be putting in my kit with some explanation. Since we bought the 72 hour kit, funds are low at the moment for this stuff so I will be picking up stuff here and there.
- Medium sized packpack/shoulder bag - I do not want this kit to be very large and I want something that I can grab and run with. There are many different types of bags, so find one that will fit the items you want.
- Small shovel - you never know when you need to dig a hole.
- Good flashlight - you can never go wrong with a good flashlight. I wouldn't limit this to just one. I am planning on getting a large heavy duty maglite and then a smaller one for carrying around. Don't forget the batteries!
- Folding or cable saw - these are great for clearing small trees or trimming limbs. Need some sticks for a makeshift shelter - saw some off a nearby tree and you are good to go.
- Knives - notice that this is plural. Having a knife in a survival situation is as important as having oxygen, you will find out that you use them a lot more than you think. I would have both fixed blades and folding knives. Make sure that you have a sharpening stone too.
- Storm proof matches - these are great. They look like normal matches on steroids. They can light underwater and can withstand a good breeze. Although they are waterproof, I would still keep them in something airtight.
- Water purification tablets - the amount of water you can get your hands on is critical to how long you plan to survive. These tablets will purify your water and are worth their weight in gold.
- Fire starter - if your storm proof matches run out, having one of these will will keep you from having to beat two rocks together or rubbing sticks together to start a fire. They are cheap and great to have. Get two because depending on their size, they will eventually run out.
- Rope and carabiners - there are many uses for rope and the odds are that you will use it. I am packing two different types of rope - some 550 paracord and then some 3/8" climbing rope. The paracord can tackle anything small, but I wouldn't use it on a person, that is where the climbing rope and carabiners come into play. Hopefully you won't use them, but if you need to you are prepared.
- Emergency blankets - they look like aluminum foil, but they can save your life. They are small, lightweight and can keep you warm if you don't have anything else covering you. Use them as a blanket, or tape some together and make a makeshift tent.
- Light sticks - These are great to keep as a backup to a flashlight. The emergency ones can last as long as 12 hours, which is long enough to get through a night. They put off a lot more light than you think and they can give your location in case of an emergency.
- Waterproof container - OtterBox has some cool compact waterproof boxes that are perfect not only for their waterproof capabilities, but also for keeping little stuff together, like the water tablets, and anything else you choose to pack that is small. They are also good for keeping personal records from being destroyed by water. Side note: This is also good to put in your 72 hour kit - if you have to leave your house for an extended period of time, keep a copy of vital records (birth certificates, ss cards, property deeds, car titles, insurance policies, etc) so that if they are destroyed you still have some records to work with.
- Multi-tool - I already have one in the 72 hour kit, but having a second is not a bad idea. If one breaks or you lose it, you have a back up ready to go.
- Tomahawk/Hatchet - when you don't have room for a full size ax, a smaller version will do the trick. I have seen several versions of these smaller axes; some are made for "tactical" purposes and most are for camping. I like the looks of the "tactical" versions and they do have some options that a normal camp hatchet doesn't. Most have a glass breaker/spike on one end and a cutting edge on the other. The spike can be used for breaking glass, pulling apart something, or even breaking into something. And the cutting end is good for cutting, obviously. They have about the same heft to them as a camp hatchet, so I will probably be going for a tactical one. Plus you can use one to defend yourself if needed (wildlife, people, etc).
Now, this is just a start of my list, which might get a little bit longer, but not too much. Like I said, this is more of a tools and safety kit to go along with my 72 hour kit. Some might see this as overkill, but it really comes down to the level of comfort that you want. I already feel comfortable with the fact that I have an emergency supply of food. I know that if worst comes to worst, I have 4.5 days of food and supplies. With the supplemental kit, I will feel more comfortable if I needed to leave my home or have a disaster while camping. While I don't think things are going to get crazy around here, I do I want to be prepared. Plus I would like to use the items in the supplemental kit for camping and not just sit on my shelf waiting for a disaster.
September 15, 2011
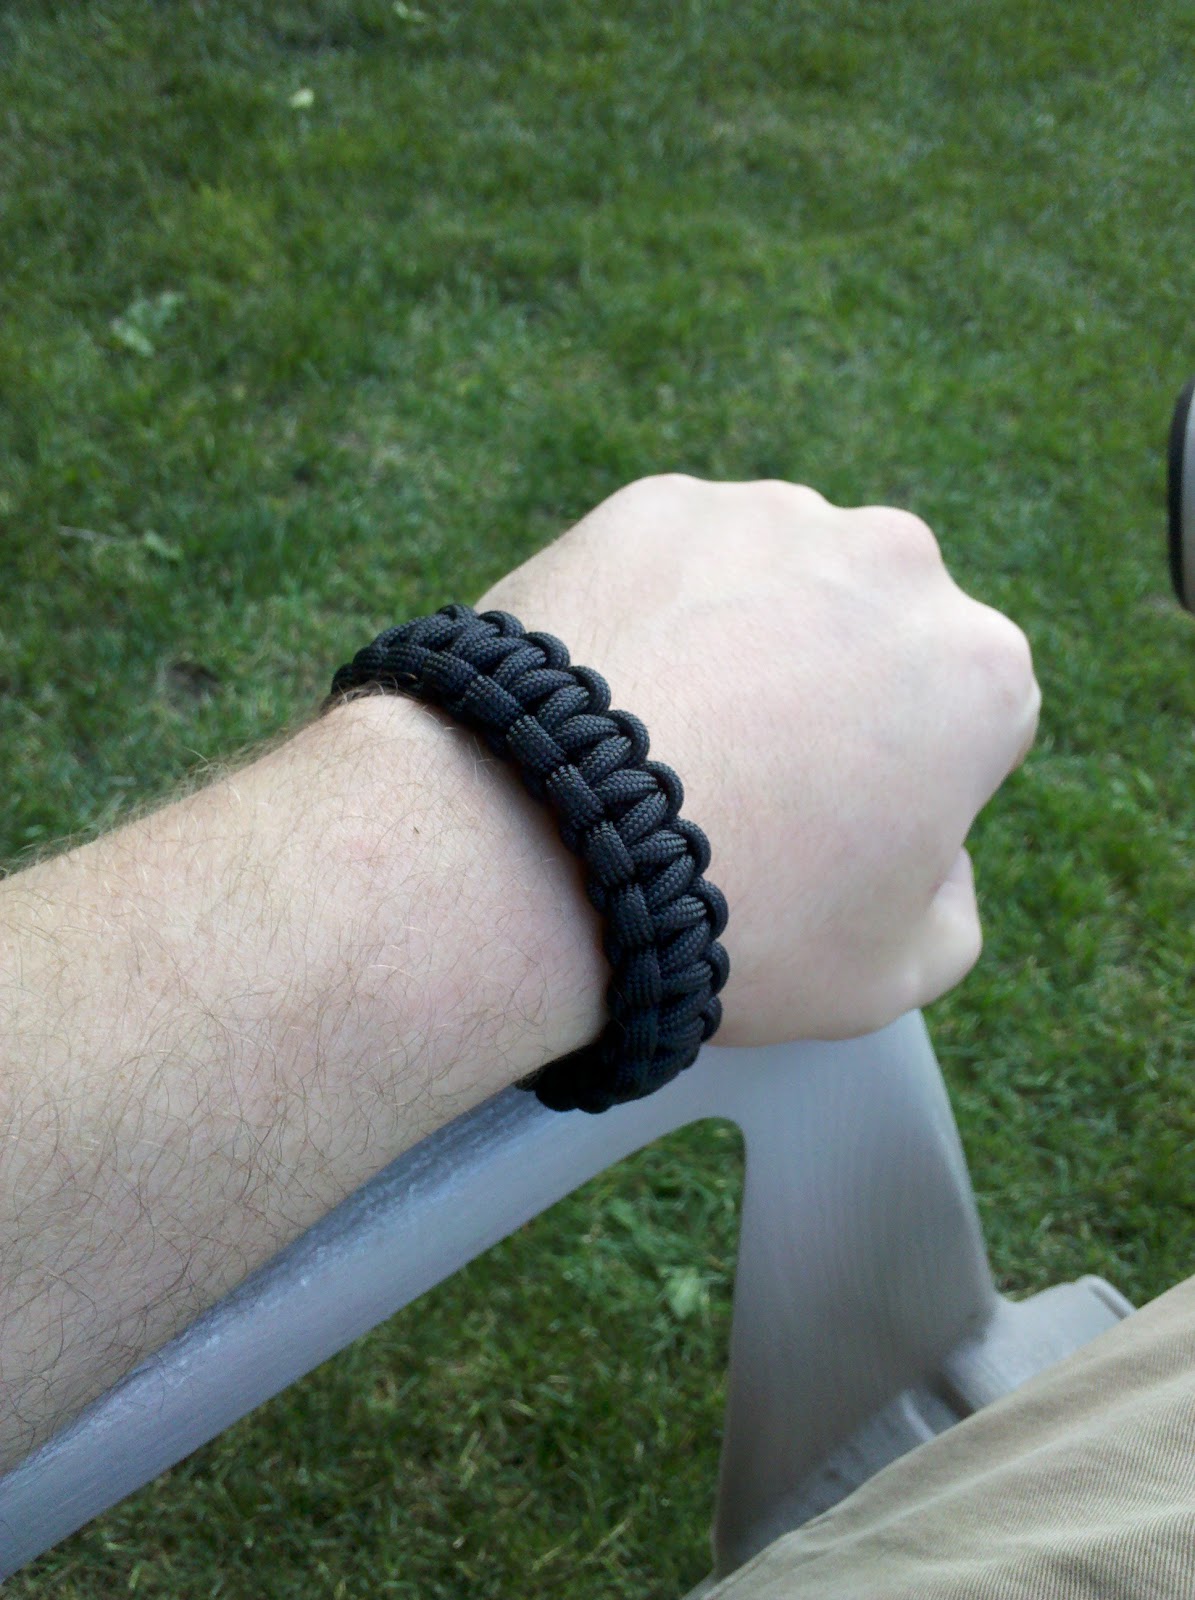
Paracord!
Last night I was checking out some websites about slings and I came across a zombie survival wishlist on amazon that I couldn't avoid. I had to check it out and one of the things listed was a type of flashlight. I clicked on it and it took me to a survival blog. The guy writing the blog was talking about his zombie survival shotgun and one thing that stood out was his sling. It was completely made out of paracord, just like those "survival" bracelets that have become popular. I was intrigued and so I headed on over to see my good friend Google and did a search. After a few YouTube videos I was convinced that I needed to make one for my shotgun. I went through the pros and cons of having one and decided that it was both cool and functional on many levels.
The only materials I needed were 100' of black 550 paracord. This isn't something you can just run down to Walmart and pick up. Luckily for me there is an awesome army surplus store in Orem. Adelyn and I headed on down and grabbed a pack of paracord and some sling swivels that would fit my shotgun. They were on sale and dirt cheap. With all my supplies in hand, I was ready to start weaving. This is definitely knitting for men. The pattern that I used is called the Cobra Knot and is very popular when making those survival paracord bracelets. The nice thing about the cobra is that it can be doubled and tripled to get a thicker and wider sling. The wider the sling the more weight distribution there is. So I decided to make a double or "King Cobra" pattern. It took around 2 hours to finish it but I am very pleased with how it came out. I did cut my cord too short on the second time weaving, so the last little bit is thinner than the rest, but this is purely cosmetic because the second layer just adds size and not strength. Plus the thin part is on the end that attaches to the stock which does not come in contact with my body.


After finishing, I had some extra paracord and so I decided to watch a few more YouTube videos and make a few more things. I ended up making a survival bracelet, a key chain thingy, and a monkey fist with a handle. It was pretty fun and it didn't cost a lot. Definitely going to do some more stuff with paracord now that I know what I am doing. I think I am going to make one for my AR-15 once it gets finished, whenever that is. That one will probably be either adjustable or based around the Magpul MS2 sling (a combo one and two point sling). Plus I think I will try my hand at doing two colors of paracord at once.

All in all, it was fun to try something new and have it be useful. I did find some people online that sell paracord slings and I made mine for less than half the price that they were asking. I would recommend this to anyone, it isn't hard at all. Just check out YouTube to learn how to weave it and go get some paracord.
The only materials I needed were 100' of black 550 paracord. This isn't something you can just run down to Walmart and pick up. Luckily for me there is an awesome army surplus store in Orem. Adelyn and I headed on down and grabbed a pack of paracord and some sling swivels that would fit my shotgun. They were on sale and dirt cheap. With all my supplies in hand, I was ready to start weaving. This is definitely knitting for men. The pattern that I used is called the Cobra Knot and is very popular when making those survival paracord bracelets. The nice thing about the cobra is that it can be doubled and tripled to get a thicker and wider sling. The wider the sling the more weight distribution there is. So I decided to make a double or "King Cobra" pattern. It took around 2 hours to finish it but I am very pleased with how it came out. I did cut my cord too short on the second time weaving, so the last little bit is thinner than the rest, but this is purely cosmetic because the second layer just adds size and not strength. Plus the thin part is on the end that attaches to the stock which does not come in contact with my body.


After finishing, I had some extra paracord and so I decided to watch a few more YouTube videos and make a few more things. I ended up making a survival bracelet, a key chain thingy, and a monkey fist with a handle. It was pretty fun and it didn't cost a lot. Definitely going to do some more stuff with paracord now that I know what I am doing. I think I am going to make one for my AR-15 once it gets finished, whenever that is. That one will probably be either adjustable or based around the Magpul MS2 sling (a combo one and two point sling). Plus I think I will try my hand at doing two colors of paracord at once.
All in all, it was fun to try something new and have it be useful. I did find some people online that sell paracord slings and I made mine for less than half the price that they were asking. I would recommend this to anyone, it isn't hard at all. Just check out YouTube to learn how to weave it and go get some paracord.
September 13, 2011
Latest and not go greatest
Ok, so I really haven't done much this past week except for tinker around with my latest attempt for a kydex press and deal with a weird slide rust problem with my P250. I had some time this past week to test out the foam that I bought for my press and after some attempts to form some kydex molds, it was just too squishy. There were some stiffer foam there at the store in Spanish Fork, but for a little more, I can order some closed cell special purpose foam just for kydex stuff. I don't know if that will happen anytime soon because I am all out of kydex material But with this upset, I was able to use the foam to reline my 1911 gun case to fit both my 1911 and P250 snugly. I had previously trashed the old foam because some gun cleaner spilled in it, and the foam was pretty saturated with the stuff.
Speaking of gun cleaner - I picked up some Safariland CLP the other day to clean my P250. Ever since I got my p250 I have noticed that after shooting it, there seemed to be some weird looking blemishes on the slide around the muzzle and around the ejection port. I was shooting some pretty crappy ammo, so I thought that it had to be because of that, but this stuff would not come off. I tried my normal cleaner and that didn't work, so I got the CLP which is supposed to be the best stuff out there (from what I have read and head about). So I got it and it didn't work the greatest at first, but I ended up leaving it soaking over night in a Walmart bag and then scrubbing it with a bronze wire brush (could have been copper, I just don't know).
On a lighter subject, I have started to upgrade my shotgun. My Mossberg 500 hasn't gotten any love for a while; I did take it with me this summer on our trip to Virginia though. Even on vacation, it didn't get to see any of the sights. To make up for this, and for other reasons such as better ergonomics and accessibility, I decided it was time to make a few upgrades - a new stock, fore end, fore grip, and shell side saddle.
Back when I was looking into buying this shotgun, I was looking for something that I could use for home protection. This shotgun is called a Cruiser (not really sure why) and came with a stock and a pistol grip. I love the looks of the pistol grip, but after a bad experience involving some magnum slugs and a split upper lip, the pistol grip is gathering dust in a drawer somewhere. With the stock installed, I have noticed that I have a hard time shouldering the gun and being able to comfortably use the pump mechanism. I have to reach to get a firm grip on it, and sometimes I end up holding on to the area behind the fore end. This is all because the stock has a very long length of pull (LOP) meaning the length of the stock. The original Mossberg synthetic stock that comes on their shotguns has a 14" LOP and it is too long for me. To change this, I am looking into an m-4 style adjustable stock. They do make shorter solid stocks, but I want one that is adjustable. I haven;t heard good things about the ATI stocks, so I am leaning more toward a Blackhawk! Knoxx stock. They are pretty solid and not to hard on the wallet. There are two versions, one that includes a recoil reducing system and the other that does not. The latter is half the price of the recoil reducing one and I have heard that the recoil system can fail and slap you in the face each time you shoot. Because of that I am going with the less expensive one. I can handle the recoil so this won't be a problem.

With a new stock, I can easily grip the fore end, and with that, an upgraded fore end will allow for a new fore grip and better control over the pump arm. I recently purchased a new fore end on eBay which should be coming today or tomorrow (hopefully today). It is a full length tri-rail with lots of room for added accessories, such as a new fore grip. I was a little bit concerned when ordering, because Mossberg had changed some things with their pump arms in 2008, so most of the aftermarket stuff is made for their pre-2008 models. Luckily I figured out that I had a pre-2008, so my new fore end will fit. Once installed, I will have a great platform to mount a Magpul AFG fore grip. The AFG stands for Angled Fore Grip, and it quite uniquely shaped. With this mounted, it will give a better grip on the pump arm and in turn better control while shooting and reloading. There are two versions of this, the first one with is larger and the second one which is more streamlined, and I am leaning more toward the first version, just because the larger size will help control the more violent movements of a shotgun.


The last upgrade is a shell side saddle. A side saddle is a mounting plate that attaches to the receiver of the shotgun on the opposite side of the ejection port that holds 6 shotgun shells. While looking very cool, it makes 6 shells easily accessible for reloading and not having to carry extras in a pocket of bag. the shells are held in place with tabs and are very visible if you are carrying different types of shells (slugs, buckshot, target loads, bird shot, etc). Because this is a home defense shotgun, I will probably carry two different types, buckshot and low recoil slugs, and with this side saddle, I can tell the difference between the two and load what is necessary.
 The great thing about upgrading a shotgun is that the upgrades are generally inexpensive. Most of the upgrades that I am doing are less than 30 dollars each, which the stock being a little bit more. Definitely do-able for someone on a budget. Pictures to follow once all of this is completed.
Speaking of gun cleaner - I picked up some Safariland CLP the other day to clean my P250. Ever since I got my p250 I have noticed that after shooting it, there seemed to be some weird looking blemishes on the slide around the muzzle and around the ejection port. I was shooting some pretty crappy ammo, so I thought that it had to be because of that, but this stuff would not come off. I tried my normal cleaner and that didn't work, so I got the CLP which is supposed to be the best stuff out there (from what I have read and head about). So I got it and it didn't work the greatest at first, but I ended up leaving it soaking over night in a Walmart bag and then scrubbing it with a bronze wire brush (could have been copper, I just don't know).
On a lighter subject, I have started to upgrade my shotgun. My Mossberg 500 hasn't gotten any love for a while; I did take it with me this summer on our trip to Virginia though. Even on vacation, it didn't get to see any of the sights. To make up for this, and for other reasons such as better ergonomics and accessibility, I decided it was time to make a few upgrades - a new stock, fore end, fore grip, and shell side saddle.
Back when I was looking into buying this shotgun, I was looking for something that I could use for home protection. This shotgun is called a Cruiser (not really sure why) and came with a stock and a pistol grip. I love the looks of the pistol grip, but after a bad experience involving some magnum slugs and a split upper lip, the pistol grip is gathering dust in a drawer somewhere. With the stock installed, I have noticed that I have a hard time shouldering the gun and being able to comfortably use the pump mechanism. I have to reach to get a firm grip on it, and sometimes I end up holding on to the area behind the fore end. This is all because the stock has a very long length of pull (LOP) meaning the length of the stock. The original Mossberg synthetic stock that comes on their shotguns has a 14" LOP and it is too long for me. To change this, I am looking into an m-4 style adjustable stock. They do make shorter solid stocks, but I want one that is adjustable. I haven;t heard good things about the ATI stocks, so I am leaning more toward a Blackhawk! Knoxx stock. They are pretty solid and not to hard on the wallet. There are two versions, one that includes a recoil reducing system and the other that does not. The latter is half the price of the recoil reducing one and I have heard that the recoil system can fail and slap you in the face each time you shoot. Because of that I am going with the less expensive one. I can handle the recoil so this won't be a problem.


September 5, 2011
Labor Day Hike
As a family, we try to get out and about to do fun things. This mainly ends up staying home and watching a movie or playing in the half yard behind out 4-plex. My wife Lindsey and I have been married for over 4 years and have both lived in Utah for around 6 years. In those years, we have not been to a lot of the popular touristy spots. There are tons of places to go and see here in Utah, but it has been hard for the two of us to get out and see them. Add our daughter into the mix and that turns into a lot of excuses for not going. Well, we have turned a new leaf so to speak and have made an effort to go see more places and do more things.
Our latest adventure was a short morning hike on the Grotto Trail along the Nebo Scenic Loop in Payson, UT. The Nebo Scenic Loop is a great drive up Payson Canyon and there are a lot of hiking trails along the way and some great fishing spots in the Payson Lakes area. The Grotto Trail follows a creek to a grotto created by a waterfall. It isn't very large, but it is still pretty cool. The water flow was pretty light due to the time of year. From what I have heard it can get pretty sketchy in the spring with the snow pack melting and the water flowing pretty fast.

The hike was very nice. The trail was well marked and there were several small bridges to cross the creek as you hike up. It took around 45 minutes round trip and the trail length is estimated at 0.3 miles one way. So like I said, it was pretty easy and it lasted long enough to keep our daughter Adelyn interested and happy, but not long enough that she hated her life. She even was sad to see the car when we were done. She wanted to go back and walk across the bridges again.
Our next trip planned is to head up to see the Salt Flats, Antelope Island, and The Great Salt Lake. These are all in the same general area, so we can probably hit all three on a Saturday.
September 4, 2011
Kydex press beginnings
This past week has been very busy and so I was only able to get the materials needed for the press. Assembly will have to wait until this coming week. But while waiting, I can list the materials I am using ad the general design concept.


Materials:
2" thick High Density Polyurethane foam padding - I picked this up at Jo-Ann's Fabrics. It is supposed to be used for seat cushions, but it has the perfect density and form.
Some sort of adhesive to attach the foam to the plywood
Scrap plywood 9"x15" for top and 11"x15" for bottom
scrap piece of 2x4 at least 15" long
two standard door hinges
assorted screws for assembly (drywall or wood screws will work)
2 or 3 clamps - I am using bar clamps I already have that I bought from Harbor Freight
The foam piece was 17"x15". I could have bought 2 pieces, but that would make for a very large press, and I don't need something that big. So I took the piece and cut it in half. At this size, I can mold handguns and various sized knives and magazines. I really don't know of anything else to work with a this time, but if something comes up, I can easily make a larger press.


The whole press will look like a book. The bottom piece of plywood is larger so the 2x4 will attach to it and act as the "spine" of the press. The foam will be glued to the top and boom piece of plywood and the door hinges will attach to the top piece of plywood and the 2x4. The result will look like a book and the clamps will hold the press closed while whatever is being squished inside. Here is a picture of one that is larger than what I am doing, but has the same design.

Once this is put together, I will post pictures of the assembly and hopefully finish my P250 holster.
September 1, 2011
Apocalypse surviving AR build...
I have come to the conclusion that I need an AR-15. It seems that this is the optimal firearm of an apocalypse. Movies these days (sources of absolute truth) have taught me that if I am prepared with the right tools, I can survive. So with this in mind, I need to build an appropriate rifle that will suit my needs for any type of apocalypse.
Lets talk basics. There are several parts that make up an AR-15, and those are separated into two sections, an upper and a lower. Complete uppers and lowers attach to one another by two take down pins, and uppers and lowers are usually interchangeable, with the exception of some Colt receivers. The lower is comprised of the lower receiver (serialized part which is the actual "gun" part), lower parts kit (trigger, internal parts, pistol grip), and stock assembly (stock, buffer tube, buffer spring, buffer). The upper is comprised of the upper receiver, BCG - bolt control group (bolt housing, bolt, firing pin), charging handle, barrel, gas system, forend (rail system or hand guard), and muzzle device. There are many different companies that supply these parts and so if you piece one together, there are thousands of combinations ranging from budget builds to one-off customs that cost several thousands of dollars. Or you can buy a complete rifle from one manufacturer.
I am going the route of buying separate parts and assembling one myself. With the exception of some specific wrenches (remedied by buying an armor's wrench) and a torque wrench, assembly can be done with tools found at home. I am looking forward to putting one together not only to save money, but to know the ins and outs of building and maintaining an AR-15.
My AR-15
To survive any type of apocalypse, you need something that can adapt to whatever situation there is. Because there are many different types of apocalypses (I Am Legend type, zombie, 21 Days Later type, terminators, etc), I want an AR-15 that can adapt. One key part that will allow this is a rail system that has some good real estate to attach whatever accessory that is necessary. Whether you need a flashlight to see in the dark when avoiding terminators, laser sights to make quick work of shooting zombies from the hip while trying to keep them from eating your friend's brain, a scope to hunt wild animals when food supplies run out, or a foregrip to make sure you can maintain a steady aim when shooting because you need to make each shot count or else Billy gets eaten by a new species of mutant squirrels, each one can be mounted on a rail system and ready to use.
The AR-15 that I am planning to build will consist of the following:
- Forged upper and lower receivers (there are billet receivers, but they are new and expensive)
- A bolt control group that is either chrome plated or has the Fail Zero coating on it to reduce malfunctions
- Mid length gas system
- 12" rail system
- 14.5" barrel with pinned muzzle device that brings the barrel to 16" (legal purposes, I don't want to deal with the paperwork of having a short barrel rifle)
- Adjustable stock
- Foregrip - either Magpul's AFG or RVG
- Flip up sights
- 1-4 power scope - these are great for close encounters, but can still take out targets at far distances
- Magazines - Magpul PMAGS - depending on the type of apocalypse, I will need at least 20
- Good sling - when you need to flee from zombies, having to carry your gun in your hands will slow you down and that is never a good thing, except for your friends, because you will be the one to get eaten and not them
There are many different manufactures for each of these parts, so the fun part is deciding which ones to go with and how much I want to spend. I want to do a budget build, but there are some parts that I am willing to spend the extra money for. Having cheap stuff can end up costing you more in the long run, and you want reliable parts when there is only your gun between you and the group of mole people after your eyes.
*Side note*
Although I speak of zombies, terminators, mutant squirrels, and mole people, I do want to say that these are just possible worst case scenarios. The reality is that having a good AR will equal years of enjoyment and if necessary the means of protecting yourself and your family. I love the idea of home protection, but the purpose of this particular gun will not be for protecting my family. I am not worried that if I don't have this gun my family will not be safe. I am not one of those gun enthusiasts that cram 2nd amendment stuff down people's throats or say that everyone needs a basement bomb shelter full of guns because you never know what is going to happen. I enjoy firearms for recreational use and if there ever is a zombie apocalypse, then I will be able to use my firearms to protect my family from having their brains eaten by the neighbors.
Subscribe to:
Comments (Atom)